
Young child practicing handwriting skills with adult guidance at table
How to Teach Handwriting Letters to Young Children?

Content
Teaching a child to write letters sneaks up on you. Yesterday they were drawing wild loops everywhere, today they're demanding to know how to spell "dinosaur" so they can label their drawing. But here's what catches most parents off guard: handwriting isn't really about the pencil and paper part. It's built on months—sometimes a full year or more—of groundwork you might not even recognize as "writing prep."
I see the same pattern repeatedly: parents grab a letter tracing workbook the moment their kid shows interest, then wonder why it turns into a frustrating mess. That's backwards. You wouldn't hand someone ski poles before they can balance on their feet. The hands need preparation first, and that preparation looks nothing like what you'd expect.
Understanding Handwriting Development by Age
Kids move through handwriting stages in a fairly predictable order, though your neighbor's child and yours might hit the same milestone months apart. That's fine. Understanding what's typical just helps you avoid pushing too hard or worrying unnecessarily.
Ages 2-3: The Scribble Stage
Two-year-olds are discovering that moving their arm makes marks appear. Revolutionary stuff, from their perspective. They'll clutch crayons in their whole fist and make whatever marks happen—straight-ish lines going down, circular scribbles, enthusiastic dots everywhere. This is exactly right for their age.
Most toddlers can copy a line going up and down by 24 months, a line going sideways by 30 months. Circles show up around the third birthday. Expecting letter shapes now is like expecting them to read chapter books.
Ages 3-4: Pre-Writing Shapes
Now you'll notice actual control emerging. Kids copy simple shapes: circles, plus signs, squares. They might switch from fist-grabbing to holding the crayon with fingers. Some show a clear preference for one hand, though plenty still use whichever hand is closer to the crayon.
By four, most kids copy a plus sign and circle without your help. Some trace simple letters if you draw them first, but they'll form them wrong. Their brains aren't ready to remember the specific sequence of strokes yet.
Ages 4-5: Letter Emergence
This is when readiness actually appears. Kids recognize letters and actively want to write them. They copy basic letters, particularly the ones in their name (which they've seen a thousand times). Capital letters come first—they're visually simpler with all those straight lines.
Fine motor control takes a leap forward. Many four-year-olds draw stick figures with a head, body, and two to four limbs. By five, they copy triangles and some letters the right way.
Ages 5-6: Formal Letter Learning
Kindergarten is where systematic letter instruction typically begins. Kids learn all the capital letters and start on lowercase. They grasp that letters have specific starting spots and directional rules. Mixing up b and d, or p and q, is still completely standard and not worrying.
Most six-year-olds write their full name and copy short words. Letter sizing bounces around and spacing is chaotic, but the actual formation should be mostly correct when you're guiding them.
Ages 6-7: Refinement
First grade focuses on consistency, appropriate sizing, and building speed. They should know how to form every letter and write basic sentences. Reversals should drop off noticeably by age seven.
Warning signs at any stage include total refusal of writing tasks, can't imitate shapes that match their age level, or complaining that writing hurts. Those situations need professional eyes on them.
Building Pre-Writing Skills Before Letter Formation
Before letters make sense, hands need specific preparation. Think of these as conditioning exercises for muscles you can barely see.

Author: Marcus Hollow;
Source: raynet-merseyside.net
Activities that build pre-writing foundations include:
- Playdough work (squeezing it flat, rolling snakes, pinching small pieces off)
- Stringing beads onto pipe cleaners or laces
- Picking up small items with tongs, tweezers, or chopsticks
- Ripping paper into strips or pieces
- Squirting water guns, spray bottles, or turkey basters
- Construction with blocks, Legos, or magnetic tiles
These aren't time-fillers. They're developing the tiny muscles inside the hand that control each finger separately—the exact same muscles that'll hold a pencil correctly later.
Pencil Control Exercises That Prepare Children for Writing
Control comes before correct letters. Start with big movements and gradually shrink them down.
Author: Marcus Hollow;
Source: raynet-merseyside.net
Activities that teach following a path help children learn directional control. Try:
- Drawing roads with markers for toy cars to follow
- Finger-tracing maze paths, then repeating with crayons
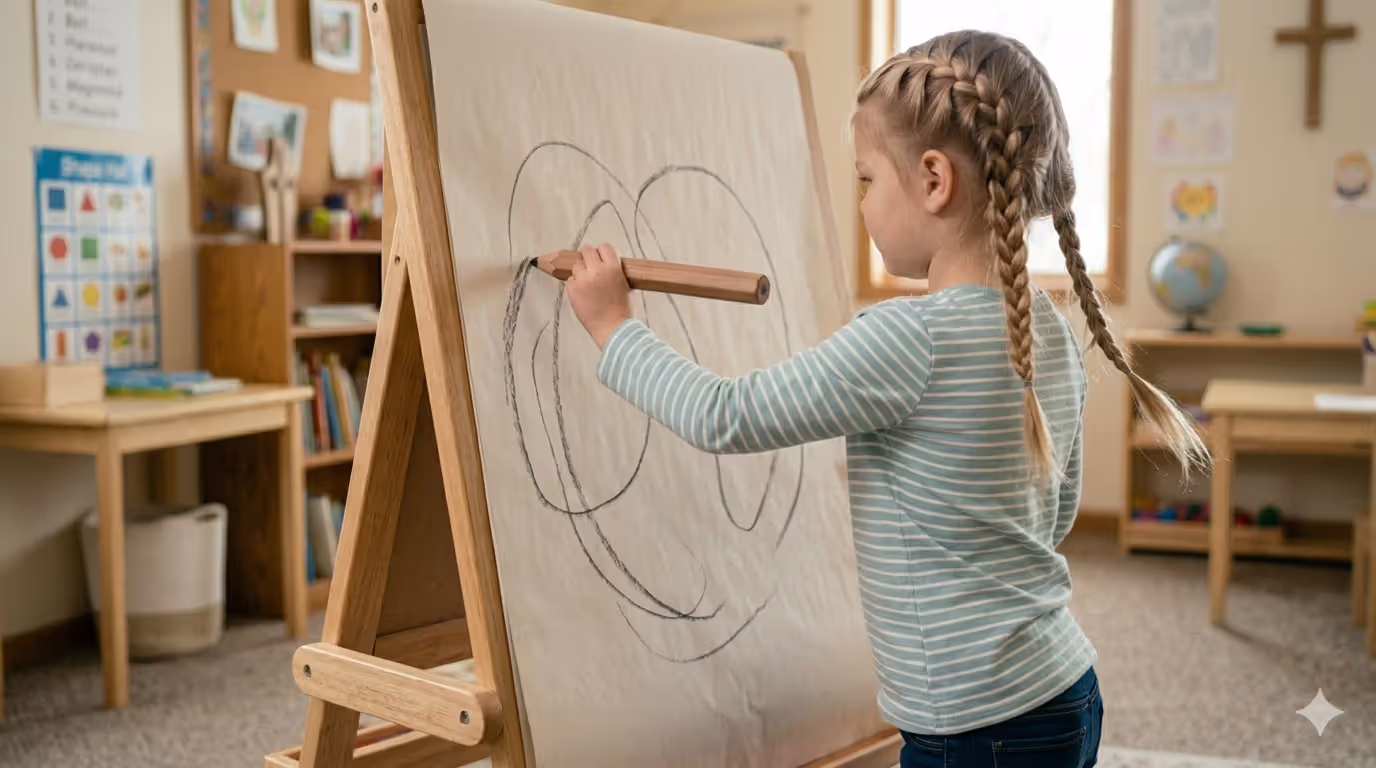
- Making large shapes on easels or paper taped to walls
- Connecting dots to create pictures
Vertical surfaces deserve more credit. When kids draw on an easel or wall-mounted paper, gravity naturally helps their wrist extend properly—a crucial piece of correct pencil grip.
Staying inside boundaries while coloring teaches stop-and-start control. Perfect coloring isn't the goal, but filling in large shapes helps children learn intentional hand movements.
Connect-the-dot pictures combine number recognition with directional control. Perfect for four- to six-year-olds.
Hand Strengthening Activities for Better Grip
Weak hands create awkward grips and quick exhaustion. These build the endurance they need:
- Using single-hole punchers (works the thumb web space intensely)
- Clipping clothespins onto cardboard to hang pictures or build structures
- Cutting paper with scissors (straight cuts first, curves later)
- Rolling tiny playdough balls using just thumb and fingertips
- Crumpling full sheets of paper into tight balls with one hand only
A functional pencil grip (tripod or quadrupod style) requires strength in the thumb web—that space between thumb and index finger. When a child's grip looks weird, their hand probably isn't strong enough yet. Build strength first, then address the grip.
How to Teach Correct Letter Formation Step-by-Step
Now we get into actual letter teaching. The order you choose matters significantly. So does your method.
Begin with capitals. They're easier for several reasons:
- More straight lines, fewer curves
- All sit on the baseline (no confusing tails hanging down)
- Kids spot them everywhere—books, signs, their sibling's homework
Group letters by how you form them, not by alphabet order. This reinforces correct motor patterns:
First group: Vertical line letters — L, I, T, H, E, F (every one starts with a top-to-bottom stroke)
Second group: Circle letters — O, C, Q, G (all use counter-clockwise circular motion)
Third group: Diagonal line letters — A, V, W, X, Y, Z, K, M, N (these require more motor planning)
Fourth group: Curve and line combinations — B, P, R, D, U, J, S (most complex formations)
Stick with identical verbal cues every single time you demonstrate. For letter A, you might say: "Top point, slide left. Back to top, slide right. Bar across the middle."
Simple cues, repeated exactly the same way, build motor memory faster.
Demonstrate in slow motion while they watch. Then physically guide their hand through it several times. Finally, let them try alone while you give the verbal cues.
Emphasize where to start above everything else. Stick a green dot where they start and a red dot where they stop. This prevents the "bottom-up" approach that many kids naturally default to.
For lowercase letters, wait until capitals are solid—really solid, not just "pretty good." Introduce them using similar formation groupings. This transition typically happens in kindergarten or early first grade.
Letters That Children Struggle With Most
Certain letters frustrate nearly every beginner. Knowing which ones lets you give extra attention early.
The b/d confusion is legendary. These letters mirror each other, and young brains don't instinctively prioritize left-right orientation. Actually, recognizing that a shape's direction matters is something they have to learn—it's not automatic.
Strategies for tricky b/d formation:
- Teach them weeks apart, not together
- Use physical memory aids: "b has its belly in front" or "bed spells bed with the bedposts on the ends"
- Practice them inside actual words, not isolated
- Stay calm—reversals are developmentally normal until seven or eight
Diagonal line letters (K, X, Z, Y) are harder because diagonal movements need more brain planning. Kids often draw these in chunks instead of smooth strokes.
Letter k particularly confuses children. That meeting point where the diagonals connect throws them off. Break it down: "Straight line down, then kick your leg out, then slide back in."
Letter S causes trouble because it requires a smooth change of direction mid-letter. Many kids form it backwards or make two separate curves. Show them the "snake wiggle" motion slowly.
Lowercase letters with sticks or tails (b, d, f, g, j, p, q, y) challenge spatial awareness. Kids must remember which way the tail goes and how tall the stick should be relative to other letters.
One correction approach that actually works: when a child consistently forms a letter wrong, return to multisensory practice (covered next) instead of just making them write it more on paper. Repeating incorrect formation just strengthens the wrong motor pattern.
Multisensory Methods to Reinforce Letter Learning
Paper and pencil is one learning channel. Using multiple senses simultaneously makes the learning stick better and faster.
Touch-based methods let kids feel the letter's shape:
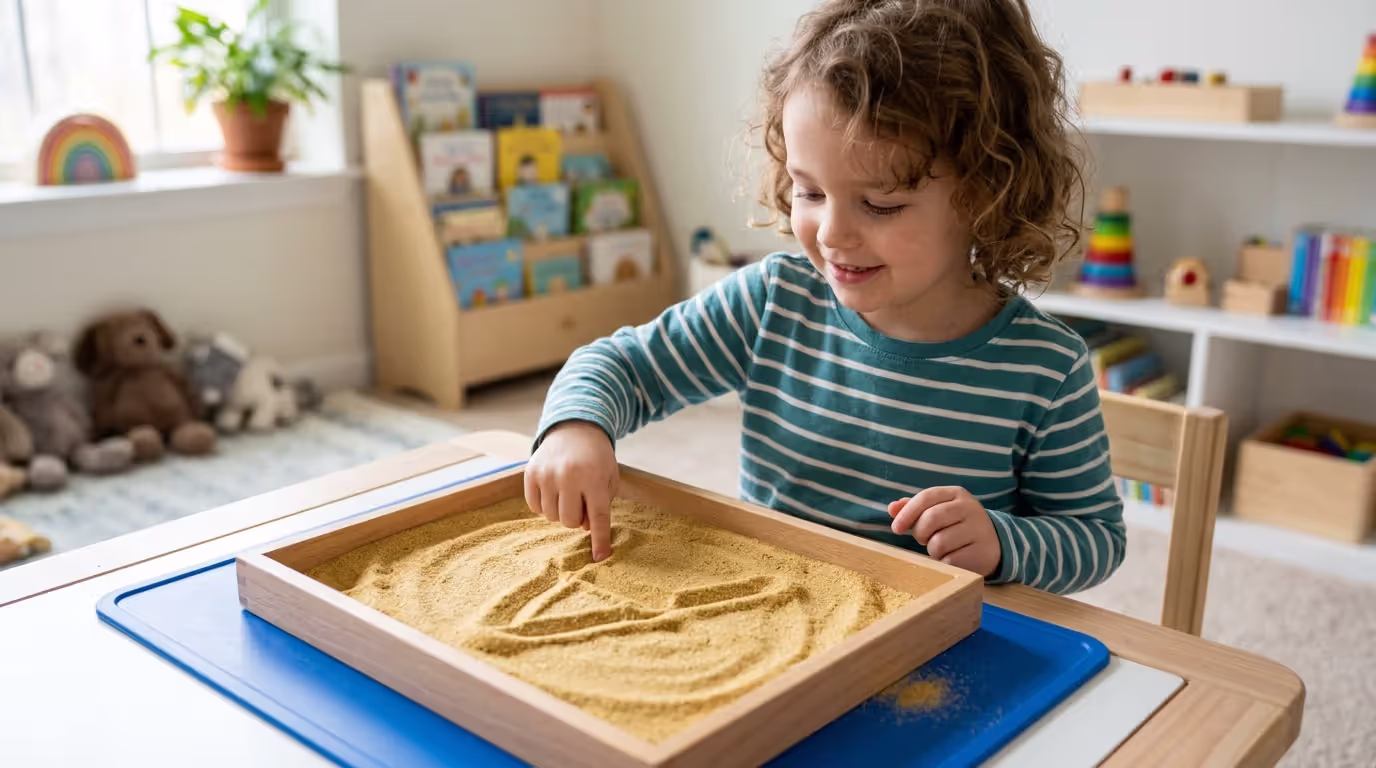
- Writing in sand, salt, rice, or cornmeal spread in a shallow tray
- Building letters from playdough, clay, or wiki sticks
- Tracing sandpaper letters with their finger
- Writing with shaving cream spread on a table
- Creating letters with finger paints or pudding
The sensory feedback reinforces the motor pattern. Plus, it's more engaging than worksheet number seventeen.
Movement-based approaches use the whole body:
- "Air writing" giant letters with big arm sweeps
- Walking along letter shapes made with tape on the floor
- Drawing enormous letters on the driveway with sidewalk chalk
- Skywriting letters while lying on their back looking up
Large motor movements actually help develop fine motor control. The brain learns the overall pattern through big movements first, then refines it down to small movements.
Visual supports strengthen memory:
- Watching you form letters while you describe each stroke out loud
- Using color-coded dots for starting points with directional arrows
- Hanging letter formation charts at their eye level
- Showing videos with animated letter formation demonstrations
Sound-based reinforcement includes:
- Alphabet songs that describe how to form each letter
- Rhymes or chants for particularly tricky letters
- Saying the strokes out loud while writing them
- Clapping or tapping out the rhythm of each stroke
Combining multiple senses in a single activity creates powerful learning. For instance, write a letter in sand (touch) while saying the strokes out loud (sound) and watching the shape appear (vision).
When to Test Handwriting Skills and What to Look For
You don't need formal testing for most kids. Simple observation during regular activities tells you what you need to know.
Things to watch during everyday writing:
How they hold the pencil — By ages five to six, most kids use a three-finger or four-finger grip. The pencil sits in the web space between thumb and pointer finger, with the middle finger supporting from below. Fist grips or unusual grips that don't seem to tire the child might be acceptable, but awkward grips causing pain or extremely slow writing need addressing.
How they form letters — Do they start each letter at the correct spot? Use continuous strokes or break letters into separate pieces? Form letters from bottom to top (a warning sign)?
Consistency from letter to letter — Can they write the same letter the same way five times in a row? Huge variation suggests the motor pattern hasn't been established yet.
Speed and exhaustion — Does writing wear them out quickly? Do they complain their hand hurts? This suggests underlying issues with strength or motor planning ability.
Spacing and sizing — By first grade, letters should be roughly similar in size and rest on the baseline. Spacing between words should exist (even if it's uneven).
Warning signs suggesting you need professional evaluation:
- Lagging significantly behind same-age kids (more than twelve months developmentally)
- Intense frustration or complete avoidance of anything writing-related
- Complaining of pain while writing
- Can't copy simple shapes appropriate for their age by five
- Hasn't established a dominant hand by age six
- Presses extremely lightly or extremely hard with the pencil
- Can't reach across their body's center line with one hand
An occupational therapist evaluates whether underlying issues exist with fine motor development, visual-motor integration, or sensory processing. Getting help early makes a substantial difference.
The biggest mistake is starting formal handwriting instruction before a child has the foundational skills in place. If the hand isn't strong enough and the visual-motor skills aren't developed, you're just teaching frustration. We need to respect developmental readiness.
— Henderson Sarah
That timing issue is critical. Which connects to common mistakes.
Common Mistakes Parents Make When Teaching Handwriting
Well-meaning parents regularly sabotage their own efforts. Here's what to avoid.
Starting before they're ready. The most frequent error by far. Just because a three-year-old wants to "write letters" doesn't mean their brain and hands are developmentally ready for correct formation. Let them explore and scribble freely. Formal instruction can wait six months or a year.
Demonstrating incorrect formation. When you show letter formation incorrectly—starting from the bottom, using backward stroke direction—your child copies exactly that. If you're uncertain of the correct way, look it up before teaching.
Overlooking grip issues. An inefficient pencil grip doesn't spontaneously improve. The longer a child uses an awkward grip, the more difficult changing it becomes. Address it early through hand-strengthening activities and grip tools when needed.
Choosing the wrong writing tools. Fat pencils aren't automatically better. Many kids actually handle regular pencils better once they have adequate hand strength. Tiny golf pencils (one to two inches long) can encourage proper grip positioning. Try different options.
Demanding neatness too early. In the beginning stages, correct formation trumps beauty every time. A correctly formed but messy letter beats a beautifully traced but incorrectly formed one. Neatness develops naturally with practice.
Practicing inconsistently. Five minutes every single day beats one thirty-minute marathon weekly. Motor skills need regular, repeated reinforcement. But don't overdo it—marathon sessions lead to fatigue and sloppy habits forming.
Making it all worksheets. When handwriting turns into a daily battle, everyone loses. Balance worksheet practice with sensory activities, games, and real-world writing opportunities (birthday cards for grandparents, the family grocery list, signs for their bedroom door).
Comparing kids to each other. Developmental timelines vary wildly and normally. Your neighbor's four-year-old might write beautifully while yours still scribbles enthusiastically. That's completely fine. Pushing a child past their readiness level creates anxiety around the entire act of writing.
Author: Marcus Hollow;
Source: raynet-merseyside.net
The better approach: follow your child's developmental lead, provide appropriate activities matching their current level, and practice patience. Handwriting unfolds over years, not weeks.
Handwriting Development Milestones by Age
| Age Range | Expected Skills | Typical Letter Mastery | Appropriate Activities |
| 2-3 years | Whole-hand grasp; copies vertical and horizontal lines; makes circular scribbles | None—this is the pre-letter exploration stage | Large crayons; free scribbling; drawing on vertical surfaces like easels; finger painting |
| 3-4 years | Copies circles and plus signs; may show hand preference; holds crayon with fingers instead of fist | May recognize some letters; attempts letters in their name (usually formed incorrectly) | Shape tracing; playdough manipulation; scissor cutting; coloring large areas |
| 4-5 years | Copies squares and some letters; draws stick figures with 2-4 body parts; increasing hand dominance | Capital letters, especially those in their own name; formation remains inconsistent | Pre-writing pattern worksheets; letter tracing; sand/shaving cream writing; practicing name writing |
| 5-6 years | Copies triangles; writes most capital letters; beginning lowercase letters; proper pencil grip developing | All capital letters; common lowercase letters (a, c, o, s, and similar); reversals remain common and normal | Systematic letter instruction; handwriting workbooks; writing simple words and short sentences |
| 6-7 years | Writes all letters; increasing consistency in sizing and spacing; reversals decreasing significantly | All capital and lowercase letters; beginning to develop their own writing style | Sentence writing; creative writing activities; refining spacing and sizing; building writing speed |

Author: Marcus Hollow;
Source: raynet-merseyside.net
FAQ: Handwriting Letters Questions Answered